UnityのUI ToolkitでネストされたプロパティとUXMLをバインドする方法についてまとめました。
Unity 2021.3.16f1
やりたいこと
いま、以下の記事のようにUI Toolkitを使ってInspectorを作成することを考えます。
基本的なバインド方法については上の記事の通りですが、本記事では以下のコンポーネントのように、ネストされたプロパティとバインドする方法についてまとめます。
using System;
using UnityEngine;

public sealed class Example : MonoBehaviour
{
    [SerializeField] private TimeData timeData = new();

    public void Update()
    {
        timeData.Update();
    }

    [Serializable]
    private sealed class TimeData
    {
        [SerializeField] private int frameCount;
        [SerializeField] private float deltaTime;

        public void Update()
        {
            frameCount++;
            deltaTime = Time.deltaTime;
        }
    }
}
ドットで階層を指定
まず一つ目は、ドットで階層を表現することでバインドパスを指定する方法です。
今回の例では、バインド用のパスはtimeData.frameCountやtimeData.deltaTimeのようになります。
これらをBinding Pathに直接入力することで、ネストされたプロパティとバインドできます。

BindableElementを使う方法
この方法とは別に、以下のようにtimeDataをBinding Pathとして持つBindableElementを親にすると、その子はそこからの相対パスでBinding Pathを指定することができます。
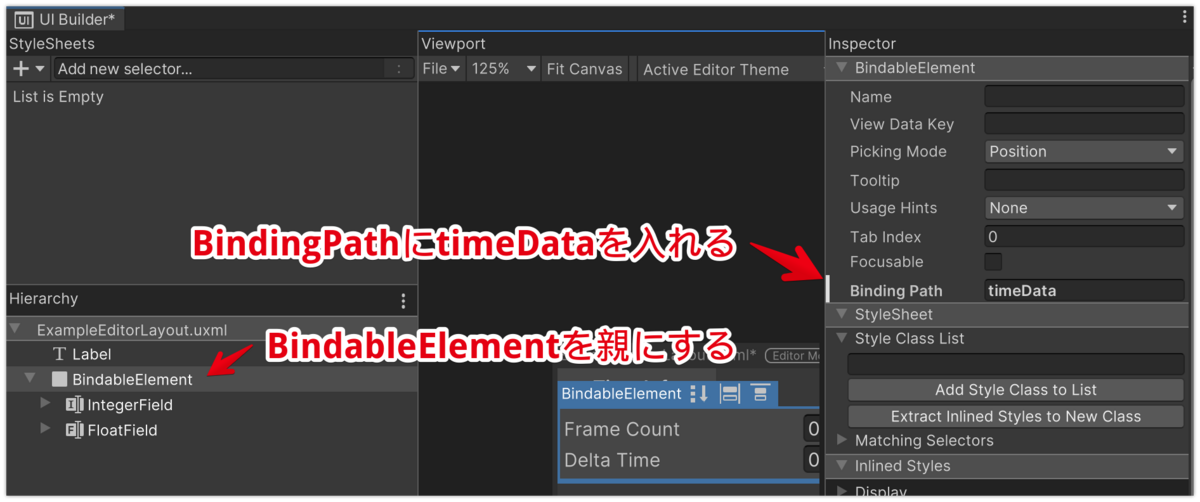
BindableElementは現状UIBuilderから(多分)設定できないので、UXMLを編集する必要があります。
編集後は上図のようにUI Binderから見れます。
参考までに、UXMLは以下の通りです。
<ui:UXML xmlns:ui="UnityEngine.UIElements" xmlns:uie="UnityEditor.UIElements" xmlns="UnityEngine.UIElements" ue="UnityEditor.UIElements" editor-extension-mode="True">
    <ui:Label text="Time Info" display-tooltip-when-elided="true" style="-unity-background-image-tint-color: rgb(70, 70, 70); background-color: rgb(70, 70, 70); width: 100px; -unity-text-align: middle-center; -unity-font-style: bold; height: 24px;" />
    <ui:BindableElement binding-path="timeData" style="background-color: rgb(70, 70, 70); padding-top: 4px; padding-bottom: 4px;">
        <uie:IntegerField label="Frame Count" value="0" binding-path="frameCount" style="-unity-font-style: normal;" />
        <uie:FloatField label="Delta Time" value="0" readonly="false" binding-path="deltaTime" />
    </ui:BindableElement>
</ui:UXML>
同じUXMLを使い回すUXML Template
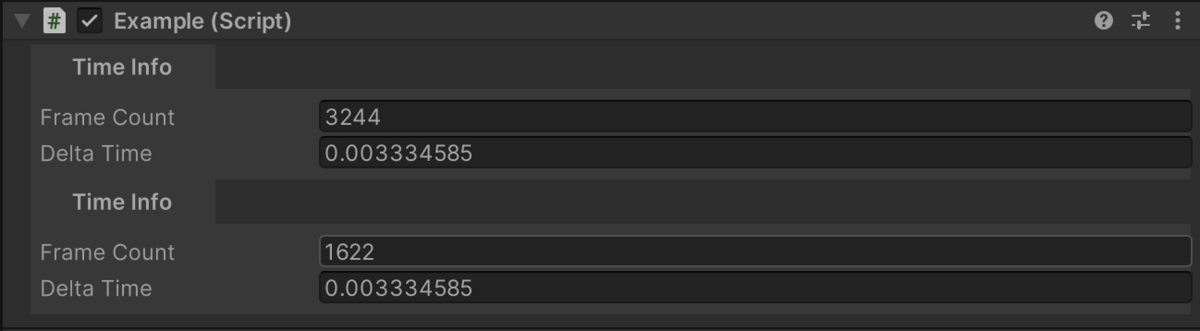
次に、以下のようにTimeDataクラスが二つ使われているケースを想定します。
using System;
using UnityEngine;

public sealed class Example : MonoBehaviour
{
    [SerializeField] private TimeData timeData = new();
    [SerializeField] private TimeData halfTimeData = new();

    public void Update()
    {
        timeData.Update();
        if (Time.frameCount % 2 == 0)
            halfTimeData.Update();
    }

    [Serializable]
    private sealed class TimeData
    {
        [SerializeField] private int frameCount;
        [SerializeField] private float deltaTime;

        public void Update()
        {
            frameCount++;
            deltaTime = Time.deltaTime;
        }
    }
}
このようなケースでは、TimeData用に作ったUXMLをテンプレートとして使うことで、TimeData用のUXMLを使い回すことができます。
まずTimeData用のUXMLは以下のように、前節のBindableElementをBoxに置き換えます。
<ui:UXML xmlns:ui="UnityEngine.UIElements" xmlns:uie="UnityEditor.UIElements" xmlns="UnityEngine.UIElements" ue="UnityEditor.UIElements" editor-extension-mode="True">
    <ui:Label text="Time Info" display-tooltip-when-elided="true" style="-unity-background-image-tint-color: rgb(70, 70, 70); background-color: rgb(70, 70, 70); width: 100px; -unity-text-align: middle-center; -unity-font-style: bold; height: 24px;" />
    <ui:Box style="background-color: rgb(70, 70, 70); padding-top: 4px; padding-bottom: 4px;">
        <uie:IntegerField label="Frame Count" value="0" binding-path="frameCount" style="-unity-font-style: normal;" />
        <uie:FloatField label="Delta Time" value="0" readonly="false" binding-path="deltaTime" />
    </ui:Box>
</ui:UXML>
これをTimeDataTemplate.uxmlとして保存しておきます。
次にInspector用のUXMLを以下のように作成します。
<UXML xmlns="UnityEngine.UIElements" xmlns:ue="UnityEditor.UIElements">
    <Template name="timeData" src="TimeDataTemplate.uxml"/>
    <Instance template="timeData" binding-path="timeData" />
    <Instance template="timeData" binding-path="halfTimeData" />
</UXML>
TimeDataTemplateとテンプレートとして使用し、インスタンスのbindingPathにそれぞれプロパティの名前を入力しています。
これを実行すると以下のように正常にバインドされていることを確認できます。