UnityのUI ToolkitでScrollViewの要素をWrapする方法についてまとめました。
Unity 2021.3.25f1
やりたいこと
UI ToolkitのScrollViewは、デフォルトでは要素が一列に並びます。

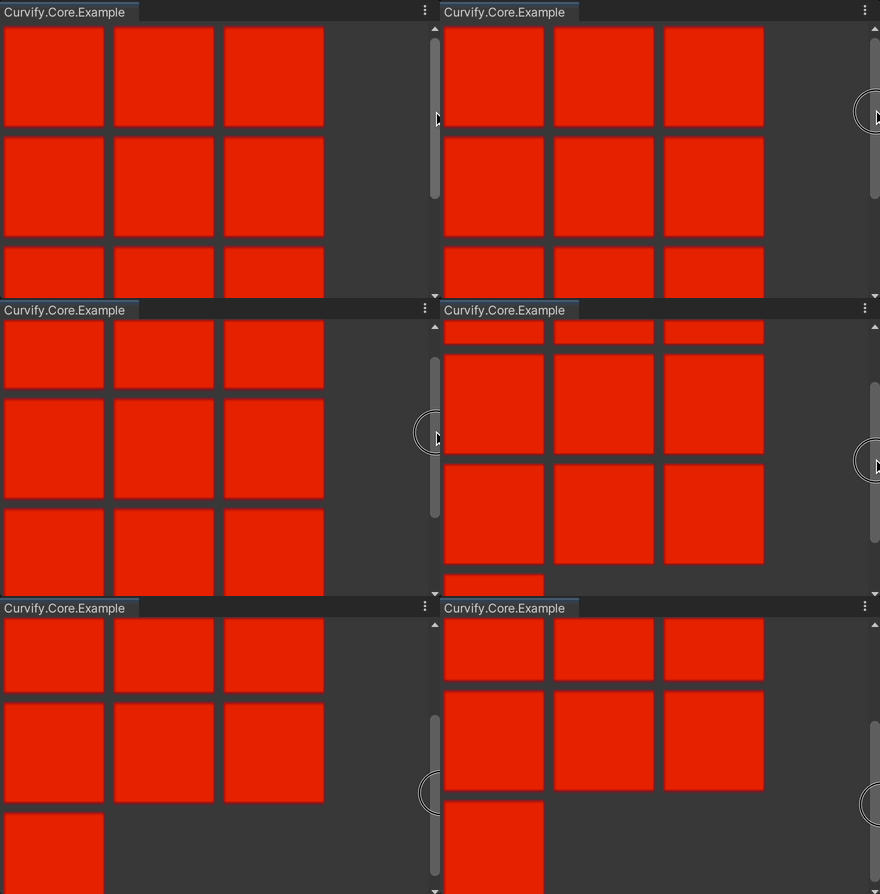
いま、要素を横方向に並べつつ、横幅がいっぱいになったら次の列に並べ、さらに縦方向の要素がいっぱいになったらスクロールをするUIを作ることを考えます。

方法
結論からいうと、以下の設定を行うことで上述の挙動を達成できます。
ただし、UI Builderからはunity-content-containerの設定を変更できないため、スクリプトあるいはUSSでこれを変更する必要があります。
次節からはそれらの方法について説明します。
その前に準備として、Scroll Viewを持つXMLを作っておきます。
<ui:UXML xmlns:ui="UnityEngine.UIElements" xmlns:uie="UnityEditor.UIElements" xsi="http://www.w3.org/2001/XMLSchema-instance" engine="UnityEngine.UIElements" editor="UnityEditor.UIElements" noNamespaceSchemaLocation="../../../UIElementsSchema/UIElements.xsd" editor-extension-mode="False">
    <ui:ScrollView />
</ui:UXML>
さらにこれを表示するEditorWindowを作ります。
Scroll Viewの要素として赤いVisualElementを10個追加しておきます。
using UnityEditor;
using UnityEngine;
using UnityEngine.UIElements;

public sealed class Example : EditorWindow
{
    [SerializeField] private VisualTreeAsset _tree;

    [MenuItem("Window/Example")]
    public static void ShowWindow()
    {
        GetWindow<Example>();
    }

    private void OnEnable()
    {
        var root = rootVisualElement;
        _tree.CloneTree(root);

        var scrollView = root.Q<ScrollView>();

        // 要素を10個追加
        for (int i = 0; i < 10; i++)
        {
            var element = new VisualElement();
            element.style.backgroundColor = Color.red;
            // サイズを100x100に
            element.style.width = 100;
            element.style.height = 100;
            // マージンを5
            element.style.marginLeft = 5;
            element.style.marginRight = 5;
            element.style.marginTop = 5;
            element.style.marginBottom = 5;
            scrollView.contentContainer.Add(element);
        }
    }
}
このスクリプトのInspectorからTreeフィールドに先ほどのUXMLファイルをアサインし、Window > Exampleからウィンドウを開くと以下の結果が得られます。

スクリプトで設定する
それではまずスクリプトでFlex DirectionとFlex Wrapを設定します。
前節のEditorWindowを以下のように変更します。
using UnityEditor;
using UnityEngine;
using UnityEngine.UIElements;

public sealed class Example : EditorWindow
{
    [SerializeField] private VisualTreeAsset _tree;

    [MenuItem("Window/Example")]
    public static void ShowWindow()
    {
        GetWindow<Example>();
    }

    private void OnEnable()
    {
        var root = rootVisualElement;
        _tree.CloneTree(root);

        var scrollView = root.Q<ScrollView>();

        // Flex Direction: Row, Flex Wrap: Wrapに
        scrollView.contentContainer.style.flexDirection = FlexDirection.Row;
        scrollView.contentContainer.style.flexWrap = Wrap.Wrap;

        for (int i = 0; i < 10; i++)
        {
            var element = new VisualElement();
            element.style.backgroundColor = Color.red;
            element.style.width = 100;
            element.style.height = 100;
            element.style.marginLeft = 5;
            element.style.marginRight = 5;
            element.style.marginTop = 5;
            element.style.marginBottom = 5;
            scrollView.contentContainer.Add(element);
        }
    }
}
コメントの部分で設定を行っています。
USSで設定する
スクリプトではなくUSSで設定するには、まず以下のようなUSSファイルを作成します。
.unity-scroll-view__content-container {
    flex-direction: row;
    flex-wrap: wrap;
}
EditorWindowのスクリプトは以下のようにスタイルシートを適用するだけに変更します。
using UnityEditor;
using UnityEngine;
using UnityEngine.UIElements;

public sealed class Example : EditorWindow
{
    [SerializeField] private VisualTreeAsset _tree;
    [SerializeField] private StyleSheet _style;

    [MenuItem("Window/Example")]
    public static void ShowWindow()
    {
        GetWindow<Example>();
    }

    private void OnEnable()
    {
        var root = rootVisualElement;
        _tree.CloneTree(root);

        var scrollView = root.Q<ScrollView>();

        // スタイルシートを適用
        root.styleSheets.Add(_style);

        for (int i = 0; i < 10; i++)
        {
            var element = new VisualElement();
            element.style.backgroundColor = Color.red;
            element.style.width = 100;
            element.style.height = 100;
            element.style.marginLeft = 5;
            element.style.marginRight = 5;
            element.style.marginTop = 5;
            element.style.marginBottom = 5;
            scrollView.contentContainer.Add(element);
        }
    }
}
スクリプトのInspectorからStyleフィールドに先ほどのUSSファイルをアサインしておきます。
動作確認
上記の対応をした後にWindow > Exampleからウィンドウを開くと以下の結果が得られます。

ScrollViewの要素をWrapできていることを確認できました。