Unityで深度とビュー空間の法線を使って輪郭線を表示するポストエフェクトを実装する方法をまとめました。
Unity2019.2.11
はじめに
先日、ビュー空間の法線とソーベルフィルタを使って輪郭線を表示する記事を書きました。
今回はこれに加えて深度値を使うことでもう少し綺麗なアウトライン描画を行います。
シェーダやスクリプトは上の記事のものを流用するので先に一読することをお勧めします。
シェーダ
それでは早速ですがシェーダです。
Shader "NormalOutline"
{
    Properties
    {
        _Thickness ("Thickness", float) = 1.0
        _Threshold ("Threshold", float) = 0.0
    }
    SubShader
    {
        Cull Off
        ZTest Always
        ZWrite Off


        Tags{ "RenderType" = "Opaque" }

        Pass
        {
            HLSLPROGRAM
            #pragma vertex vert
            #pragma fragment frag

            #include "UnityCG.cginc"

            struct appdata
            {
                float4 vertex : POSITION;
                float2 uv : TEXCOORD0;
            };

            struct v2f
            {
                float2 uv : TEXCOORD0;
                float4 vertex : SV_POSITION;
            };

            sampler2D _CameraDepthNormalsTexture;
            float _Thickness;
            float _Threshold;

            v2f vert(appdata v)
            {
                v2f o;
                o.vertex = UnityObjectToClipPos(v.vertex);
                o.uv = v.uv;
                return o;
            }

            void sampleDepthNormal(float2 uv, out float depth, out float3 normal)
            {
                float4 cdn = tex2D(_CameraDepthNormalsTexture, uv);
                DecodeDepthNormal(cdn, depth, normal);
                normal *= float3(1.0, 1.0, -1.0);
            }

            fixed4 frag(v2f i) : SV_Target
            {
                float2 diffUV = _Thickness / 1000;
                diffUV.y *= _ScreenParams.x / _ScreenParams.y;

                float3 norm00, norm10, norm01, norm11;
                float depth00, depth10, depth01, depth11;
                sampleDepthNormal(i.uv + half2(-diffUV.x, -diffUV.y), depth00, norm00);
                sampleDepthNormal(i.uv + half2(diffUV.x, -diffUV.y), depth10, norm10);
                sampleDepthNormal(i.uv + half2(-diffUV.x, diffUV.y), depth01, norm01);
                sampleDepthNormal(i.uv + half2(diffUV.x, diffUV.y), depth11, norm11);
                float diffDepth00_11 = depth00 - depth11;
                float diffDepth10_01 = depth10 - depth01;
                float3 diffNorm00_11 = norm00 - norm11;
                float3 diffNorm10_01 = norm10 - norm01;

                // 対角線の値同士を比較して差分が多い部分をアウトラインとみなす
                float depthOutlineValue = diffDepth00_11 * diffDepth00_11 + diffDepth10_01 * diffDepth10_01;
                float3 normOutlineValues = diffNorm00_11 * diffNorm00_11 + diffNorm10_01 * diffNorm10_01;
                float normOutlineValue = (normOutlineValues.x + normOutlineValues.y + normOutlineValues.z) / 3;
                float outlineValue = (depthOutlineValue + normOutlineValue) / 2;
                return outlineValue - _Threshold > 0 ? 0 : 1;
            }
            ENDHLSL
        }
    }
}
_CameraDepthNormalsTextureから深度と法線を取得しています。
これらをデコードするためにはUnityCG.cgncに定義されているDecodeDepthNormal()を使います。
スクリプト
次にこのポストエフェクトを適用するためのスクリプトを作成します。
using UnityEngine;

[ExecuteAlways]
public class Example : MonoBehaviour
{
    [SerializeField, Range(0.5f, 1.0f)]
    private float _thickness;
    [SerializeField, Range(0.1f, 3.0f)]
    private float _threshold;

    [SerializeField]
    private Shader _shader;
    private Material _material;

    void Start()
    {
        GetComponent<Camera>().depthTextureMode |= DepthTextureMode.DepthNormals;

        _material = new Material(_shader);
    }

    private void OnRenderImage(RenderTexture source, RenderTexture dest)
    {
        _material.SetFloat("_Thickness", _thickness);
        _material.SetFloat("_Threshold", _threshold);
        Graphics.Blit(source, dest, _material);
    }
}
ポストエフェクトの掛け方の基本的な知識は下記を参照してください。
レンダリング結果
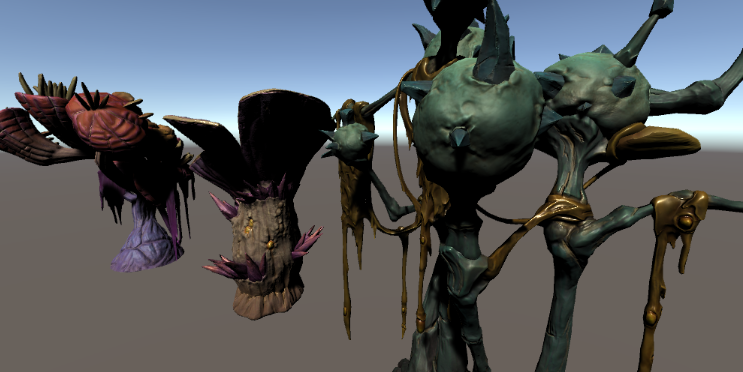
このポストエフェクトを適用した結果は以下の通りとなります。
まず適用前のレンダリング結果です。

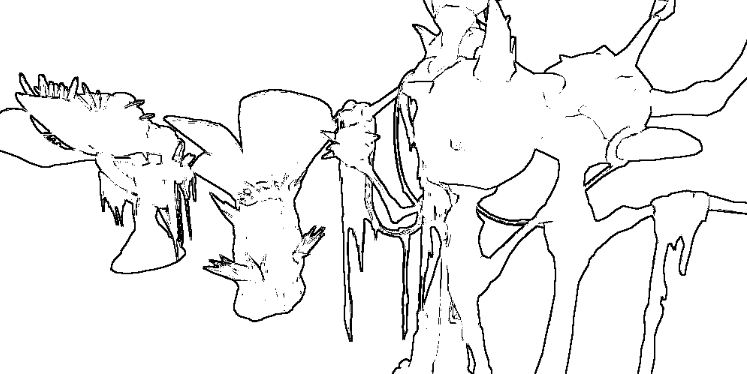
適用すると以下のようになります。

Thickness: 0.71
Threshold: 0.1
法線だけを使う方法に比べてよりアウトラインが強調された印象になりました。